Tuesday, July 6, 2010

Granita al Limone

As Paul mentioned in his last post, we needed a recipe to use the juice from the 22 Sorrento lemons that he zested for the limoncello. I’ve been ordering lemon granita and lemon sorbetto all over the place here in Italy, as I am crazy about anything lemon, so was inspired to see what it would be like to make granita al limone at home. It turns out that it’s not hard at all and I am very happy with the results. Plus, especially now that it is nearly 100 degrees during the day here in Bologna, it helps to be able to come home and find something icy and refreshing waiting in the freezer.


So, if you have a lemon tree and don’t know what to do with all of the lemons, just made limoncello and don’t want to waste the juice, and/or simply love lemon things like I do, I would highly recommend you try this. Try to choose a day to make it when you will be home for 4-5 hours and can stir it regularly as it freezes. Also make sure you have adequate space available in your freezer before you begin.
Here is the recipe. Adjust the quantities based on how much lemon juice you have. We had between 4 and 5 cups of juice, so I made 4 times this recipe.

Ingredients:

-2 cups water

-1 cup sugar

-1 to ¼ cups fresh lemon juice from high quality lemons, preferably from a neighborhood tree or a farmer’s market (approximately 5 lemons, depending on size). Start with about 1 cup lemon juice and add more from there after you taste it (in Step 4 below).

-Lemon zest (optional) from the above lemons. I didn't use any since it all went in the limoncello, and I thought the granita came out great regardless.

Steps:

1) Zest lemons. If you are using lemons that still have the zest on them (i.e. if you are not using lemons left over from making limoncello like I was), then you can wash them very well, zest the lemons, and use the zest to add extra flavor to the granita. The zest can be added to the boiling water along with the sugar in Step 3. If you want, you could also try adding some zest at the very end along with the lemon juice if you want fine pieces of zest in the final product. I have yet to see this here in Italy but I think it might be good.

2) Squeeze your lemons into a measuring cup and see how much juice you have. Set the juice aside. Adjust the quantities of water and sugar accordingly by using the ratios above.

3) Boil the water in a pot and stir in the sugar (and zest if using it, as described in Step 1). Stir well and simmer the sugar solution for about 5 minutes. Strain it if you added zest. Remove from heat and let cool to room temperature.

4) Stir the 1 cup lemon juice into the pot. Taste it to make sure you like the sugar/acid balance and add some of the remaining ¼ cup of juice if you would like for it to be more sour.

5) Put the mixture in the freezer. You can either leave the mixture in the same pot if it is not too deep and will fit in your freezer. Otherwise, transfer it to a shallower metal pan, such as a loaf pan (or 2 if you made a bigger quantity). I would suggest covering it with saran wrap or a lid to keep the flavor pure.

6) Stir periodically until frozen. Some recipes tell you to stir the mixture every half hour from when you start to freeze it. I found that mine wasn’t starting to freeze for a few hours, so it didn’t seem necessary to stir it right away, though I still did. The idea is that you want to break up the ice clumps around the edges of the pan before they turn too solid. You want to keep the texture uniform. I am not sure if it is just our freezer, but even after 2-3 hours, I found that there weren’t really any clumps to break, and at that point it was after midnight and I fell asleep. I woke up the next morning and found that the granita was frozen but I could still break it into an even texture with a fork. So in my case it was forgiving. To be safe, however, I would make it earlier in the day and try to mix/chisel it periodically until it is frozen. The goal is to have a uniform texture that has little tiny sheets/flakes of ice.


7) Transfer granita to an airtight container and store in the freezer. Take it out of the freezer 10 minutes or so before you want to serve it and chisel away at it to break it up again, if necessary. In the picture below, you can see that in the container on the right, I recently chiseled the granita before serving it, where as the container on the left hasn't been re-chiseled since I originally made it, so it would need to be chopped up before serving. Luckily it's not very hard to do.


Serve in small glasses with spoons. You can garnish it with a fresh lemon slice or a sprig of mint. The granita is perfect to eat in the afternoon on a hot day. It also makes a nice palate cleanser between courses for a fancy dinner– though only serve a tiny amount in this case, like a few spoonfuls in a tiny glass.

I hope you like it as much as I do! Let us know if you make it. And especially if anyone tries the recipe with Meyer lemons, let me know, as my friend Lisa and I are curious about how it will come out. I bet it will be great, so if you have Meyer lemons, I would try it. Other popular flavors of granita here in Italy are watermelon, mint, coffee, and almond. I want to try making coffee next.

Saturday, July 3, 2010

The newest project...

Hi everybody, it's Paul.  I thought you all might be interested in my latest project, and maybe even want to follow along on your own.

Currently there are lots of beautiful Sorrento lemons at our local fruit/veggie stand, and I've decided to honor some of them by making the very best thing that can be made with lemons.  This is undoubtedly what all lemons hope and aspire to be a part of someday...it's their highest purpose.  You're probably wondering what the heck I'm talking about.  Lemon chicken?  Lemon pancakes?  Lemon asparagus risotto?

No, my friends.  Think of something even more delicious, something positively....INTOXICATING....

Yes, I'm talking about limoncello, of course.  Everyone's favorite citrus liqueur, the cold, sweet glass of Amalfi sunshine with a serious kick.  It's very simple to make, actually, it just takes a bit of time.  If you'd like to make some too, here's what you'll need for the first step:


1. Alcohol.  Pure alcohol - 95%, I'm using 2 liters.  Everclear is a popular brand...it may be a bit tough for you Californians to get, but you can find it in Nevada or Mexico so if you or some friends are going....

2. Lemons.  Lots of them, I used 22 large ones in fact.  Non-waxed is ESSENTIAL, and organic is best if you can find them.  I wouldn't worry about trying to find actual Sorrento or Amalfi lemons, just get the freshest, thickest-skinned ones you can find, probably at a local farmer's market.

3. A large glass jar with a wide mouth and a tight-fitting screw on lid. I used 2 jars, but really all you need at this point is one, although another one will come in handy when you're filtering.

In a future step we'll also use some sugar and a filter, but these aren't necessary right now.  Pretty simple, right?  So let's get started!

Step 1.  Thoroughly wash and dry your lemons and the jar.  You don't have to sterilize the jar like you would if making beer, but clean is good.  And make sure to get all the dirt off your lemons' peel, because that's the part you'll be using.  I used the scrubby side of a dish sponge which worked well and didn't cut into the peel.

Step 2.  Get nice and comfortable.  Someplace you don't mind sitting for the better part of an hour or so.

Step 3.  Peel your lemons.  Here's the thing though - you MUST only get the yellow, outermost layer.  Just below the yellow layer is the pith, which is bitter and will ruin your 'cello.  I would recommend using a standard fruit/veggie peeler, it doesn't take that long.  If you have a Microplane it works well too, it just makes tiny shavings so you'll have a little tougher job when it's time to filter.


I don't know what got into me, but I didn't do any of the above.  Instead of taking one of the easy, sensible, and probably just-as-good routes described above, I decided to peel the lemons by hand with a paring knife. I was able to cut my peels thicker that way than I could get with the peeler, it's true.  I thought that the thicker peels might get me a little more lemon oil extracted in the end, and make my limoncello just that more delicious.  But it took a LONG time, and until I got in a little Zen-peeling-groove, was not easy to do without getting the pith.  And I don't even know if it did any good - so I would say, unless you're willing to sacrifice a sore hand and quite a bit of time for your 'cello, just use a peeler.


Step 4.  Put the alcohol and peels in your jar, close the lid, and place it in a cool dark place.  Even though you'll be able to see the alcohol turning yellow almost right away, we're going to let that mixture sit for about a month.  The peels, I've been told, will turn as brittle as potato chips.  Every few days, you want to check in on your jar and give it a nice shake or two, to mix things up a bit.


Step 5.  Figure out what you're going to do with all those lemons.  Freezing the juice works well, I hear...Emily decided to make granita with ours, which I think she'll be posting about in a day or two...

And that's it for now!  I hope some of you decide to join along by making your own limoncello, leave a comment and let us know if you do.

Sunday, June 27, 2010

Eating even better this summer

It's me (Emily) here with the nutrition hat on. But don't worry, I won't be getting too scientific. Also, those of you that are familiar with my doctoral research can rest assured: I won't mention anything about fiber here! I am doing this post because a few friends and family members have recently asked me for ideas on how to make some changes to their diets. To me, the best thing to focus on is eating more fruits and vegetables. It is way easier, more fun, and arguably more effective to add good things to your diet than to focus on taking things out of it. And especially since it is summer, the fruits and vegetables are really good right now, so eating more of them will be enjoyable. Here are 5 ideas for how to go about it:

1) Choose the best tasting, highest quality fruits and vegetables you can find. This is the most important of all of the suggestions. If they taste good, you will want to eat them rather than having to talk yourself into it. The fresher the better, so the ideal would be to grow what you can at your house or a community garden, or shop at the farmer's market or a farm stand. It's true that you will likely pay more for a peach, for example, from the farmer's market than you would at a normal grocery store. But the difference in biting into one where the juice runs down your arm vs. trying to eat one that is dry and mealy makes it clear that it is best not to waste your money on bad produce. Save up by not buying other unnecessary products at the grocery store and buy the good stuff straight from the source. If you can't always make it to the farmer's market, maybe there is another fruit and vegetable market nearby that has good produce. Here in Italy there are little markets all over. They don't necessarily offer all locally grown things, but they do have better produce than the big grocery stores.


2) Make Insalatone. Making big salads, or insalatone, is a good way to eat well in the summer. They make a light but satisfying lunch or dinner, and don't take too much time to prepare. Here is one that Paul and I made recently that had tuna, eggs, tomatoes, carrots, olives, butter lettuce, and radicchio. For salads, I would recommend not buying pre-bottled dressings, as they usually have preservatives and artificial ingredients and they can ruin the taste of your ingredients. You can do like the Italians do and pass olive oil, vinegar, salt, and pepper at the table. Here in Emilia-Romagna the vinegar of choice is balsamic. Paul and I like to dress it in a bowl so the dressing is better distributed. A good rule for the ratio of olive oil to vinegar is 3 to 1. To make an emulsified dressing, whisk the vinegar and a teaspoon of dijon mustard together in a small bowl and stream in the olive oil while continuing to whisk.


2) Arrange platters of vegetables (or fruit). Many of us are used to making a platter of raw vegetables with dip for an appetizer for a party. But this is something you can do on a regular day too. For instance, if you come back from the market, you can make a platter that same day and bring it out for a few days in a row if you don't finish eating everything. (You can do the same with fruit as well, and this will save you the problem of buying something like a cantaloupe and losing it in the refridgerator. If you cut it up right when you buy it and put it out to snack on, you will be more likely to eat it.) If you can, avoid using pre-cut baby carrots and other bagged, cut vegetables. You will notice the difference if you peel and cut fresh carrots. Paul and I like to have this appetizer before lunch or dinner while we are cooking. It also makes a good snack to eat while watching TV. In Italy the dip of choice is simply high quality olive oil with salt and popular vegetables include sliced, raw artichoke hearts. Other good options for dipping are the same vinaigrette as used for salad, or a creamy dressing made with yogurt or sour cream, lime or lemon juice, chopped green onions, and fresh herbs such as dill, cilantro or mint. If using cilantro, I recommend also adding chopped fresh jalapeno. (Writing this is making me miss cilantro and jalapenos, so please have some for me.) Here is a platter we made last week, which we ate in one sitting as an appetizer. After this I didn't really need or want dinner anymore though, so this could also make a light lunch or dinner.


3) Have fruit for dessert. When you have really good fruit in the house, it is worthy of dessert status. I like how in Italian restaurants, the dessert menu often includes a list of various fruits, which are served simply. At home, consider making a nice looking small plate of cut fresh fruit for each person to eat as a final course. Or even just putting out a bowl of fresh cherries is perfect.


4) Try something new. If you are bored with the typical fruits and vegetables you usually buy, try picking out something you have never had before the next time you go to the market. We did this recently with agretti, or barba del negus, and found that we like it enough to buy it regularly. We kept seeing it and thinking that maybe it was an herb rather than a vegetable. I finally asked a vendor what it was and how to cook it. I am finding that the vendors really like to give suggestions on how to cook what they sell, and other customers who are also buying the produce like to chime in as well, so don't be afraid to ask if you see something, want to try it, but don't know how to cook it. One of the next things I want to try are these baby eggplants....


5) Choose simple recipes with many vegetables. I like making vegetable soups because you can put as many vegetables as you want in them. Here in Italy we have also been making pasta and rice dishes with vegetables, such as pasta with asparagus and lemon, pasta with eggplant and tomatoes, and risotto with squash blossoms. If you are interested, I can post a few recipes in the future.


Buon appetito!! Cheers to GOOD TASTING, healthy food!

Friday, June 25, 2010

Pasta Carbonara

Paul here, and it's time for the next recipe!  It's a classic, although I've deviated from the most traditional version a little bit to add my own "improvements".

I highly, highly recommend you try this one - very easy to make, delicious, and economical. On first glance at the ingredients list it might sound unhealthy - but consider that it makes about 6 servings so really, you're not overdoing it.

Here's what you'll need:


1. 1 package Pasta - a thin noodle like spaghetti, you could probably use linguine too if it's thin. I wouldn't go as thin as angel hair though. As always, you want to try and get something with a nice matte finish to it.

2. 4 ounces smoked Pancetta, sliced about 1/4" thick - this is a very important ingredient, you can probably find pancetta (Italian bacon) at an Italian grocery, or Whole Foods carries it too. If you can't find smoked, you can use regular. And if you can't even find pancetta, you can use Niman Ranch applewood smoked bacon from Trader Joe's.

3. 4 eggs - you'll only use 1 entirely, and the other 3 just the yolks. For an interesting variation which I actually prefer, use 1 whole chicken egg and 4 quail egg yolks.

4. A slice of lemon - ordinary lemon.

5. Cheese: Parmigiano Reggiano and Pecorino Romano - another important set of ingredients so you should get some decent stuff. Trader Joe's usually has both. You'll need enough to make 1 grated cup of each. I only pictured the Parm, but the Romano has a very distinctive and different taste so I definitely recommend using both.

6. Extra virgin olive oil (4 tablespoons), kosher salt (to taste) and fresh ground pepper (2 teaspoons) - the magic trio, I think these are in every single thing I make and probably in 95% of Italian dishes in general. Start with plenty of peppercorns, 2 tsp doesn't sound like a lot but you'll see when grinding that it is.

OK let's get started!

Step 1:

Fill your pasta pot with water, add salt, and put it on high heat.

Step 2:

Time to prepare the eggs. Crack one of them and put both yolk and white in a small container like a cup. With your other eggs, you just want the yolks, which you should put in the same container as the first, entire egg. An easy way to separate eggs is to crack and put them into your hand. Let the white run through your fingers (do it over a bowl if you want to save the whites), and maybe pass the yolk from hand to hand. Soon it'll be white-free.


Step 3:

Now you want to chop the pancetta, into little squares or rectangles. I recommend about 1/2" by 3/4" but no need for the ruler, just do what you like.

Step 4:

Put your olive oil into a saucepan, set it over fairly low heat, and add your pancetta. The key part here is the heat - you want to cook the pancetta slow and low so that you render the fat without getting it too crispy or burning it.

Step 5:

So while the pancetta's slowly cooking, you can grate the cheese and pepper. After you've got 1 cup of Parm and 1 cup of Romano, which will take quite a while, you can mix them together in the same bowl and put it aside for now. Grind your 2 tsp pepper, which will take a while too, and put it in a separate little cup or dish.

Step 6:

When your pancetta is nice and brown, and most of the fat's rendered, it's about done. While it's still on the heat, add the ground pepper and cook for 2-3 minutes.

Step 7:

Pour the oil/pancetta/pepper mix into a large glass or metal bowl (I used another pot). It needs to cool just slightly so take a few moments and put your pasta into the water, which should be boiling by now.


Step 8:


Now take your cheese and eggs, dump them into the bowl with the oil/pancetta, and mix.

You should have a mix that looks a little bit like orangey-yellow cake batter with chunks of pork (yum, pork cake!).

If yours is not quite the same color as the pic, don't worry - our Italian eggs have extremely dark orange yolks. I'm not sure if it's an indicator of quality, or if they feed the hens marigolds or something to darken them.

Step 9:

Almost done, you just wait for the pasta. When it's done, drain it but RESERVE 3/4 cup of the water. Add the drained pasta to your sauce bowl, and gently but thoroughly mix while adding the reserved water a little at a time. You should end up with a nice creamy sauce coating your pasta.


You're done! Put the pasta in bowls, squeeze your lemon slice over the top, and enjoy. You can add salt if you need it, but you probably won't need too much if any.

Sometimes "Americanized" carbonara will have peas in it - I don't like to put peas in the sauce, but they make a good side dish. If you're making frozen peas, put them in boiling water at the same time you put the pasta in water, and the timing will be just about right.


Hope you like this one!

Wednesday, June 23, 2010

Out of this world...


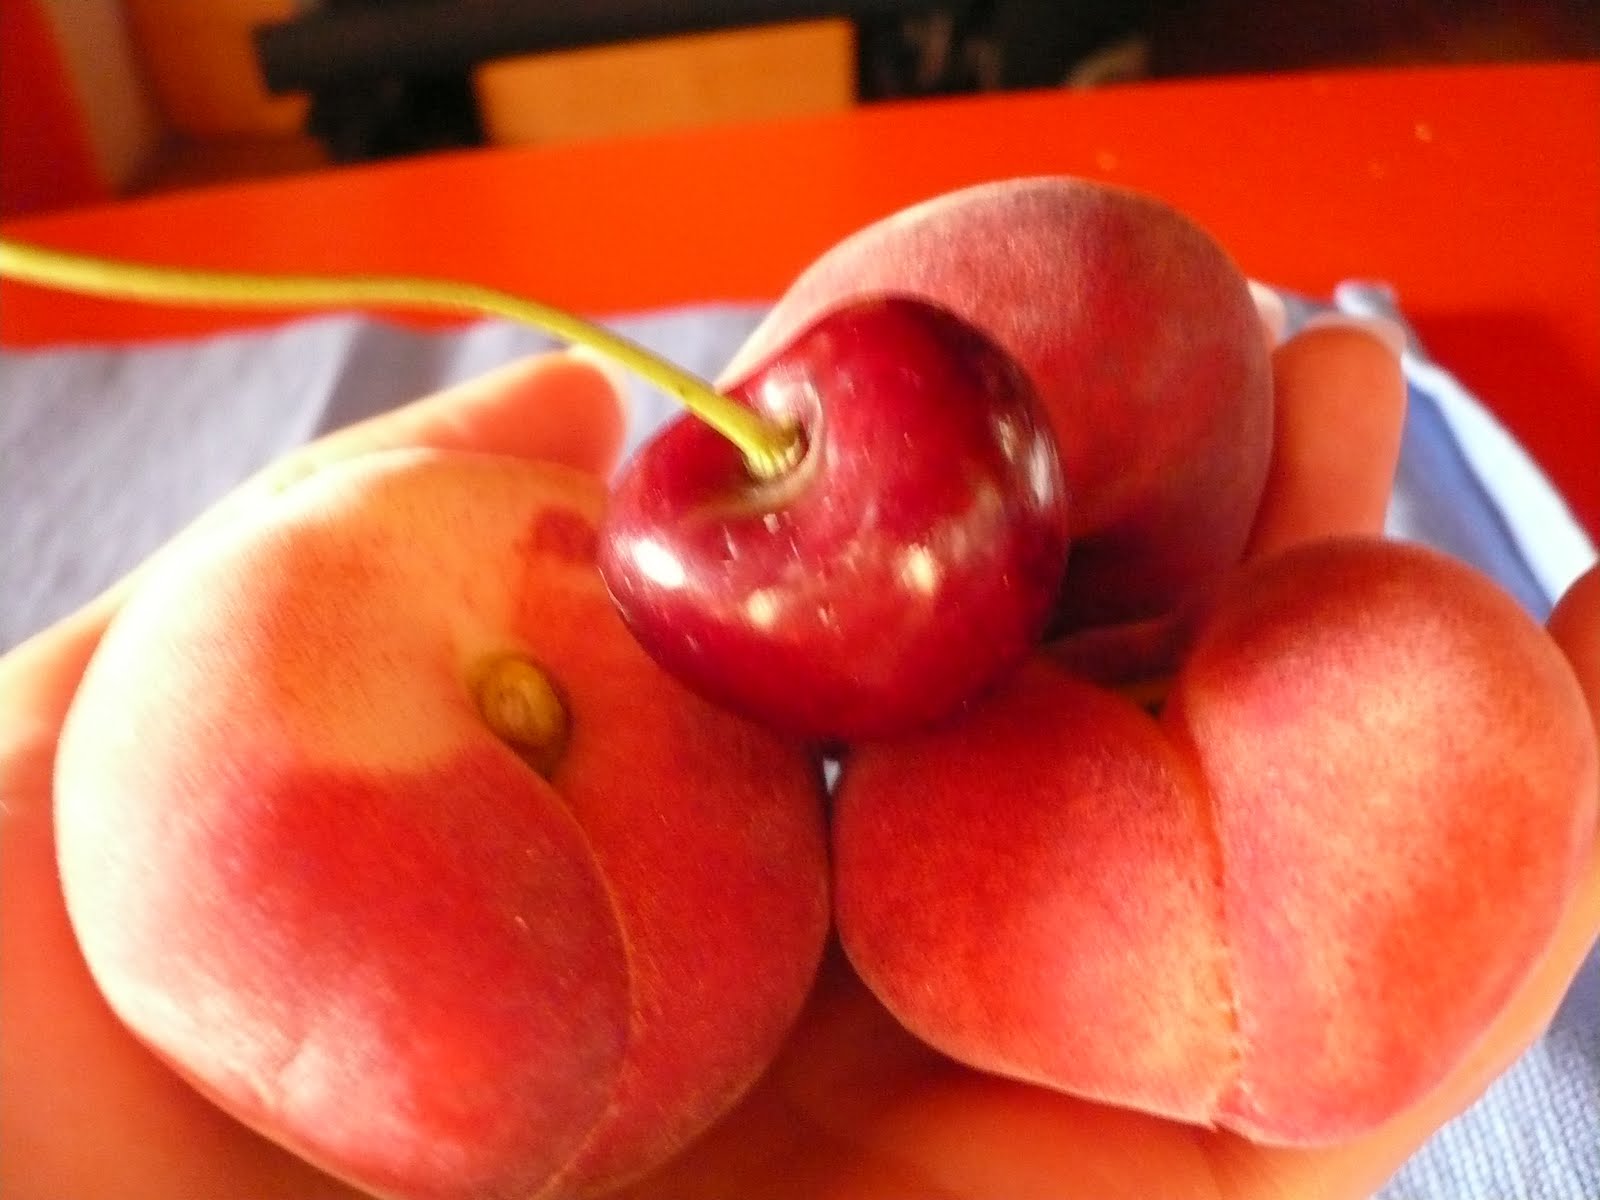
Saturn peaches have arrived on the scene here in Bologna! Aren't they adorable? These ones that we bought yesterday from our favorite produce stand are smaller than any that I have seen in the States. Cheesy title aside, they taste very good!


Tuesday, June 22, 2010

Slow Food Bologna

It's funny that I am studying obesity prevention, and Bologna, where we live, is known as "Bologna la grassa," or Bologna the fat. It's also referred to as the food capital of Italy, which is perfect as I am more specifically interested in the protective effects of gastronomy in obesity prevention. I haven't noticed that people are particularly overweight here; they actually seem less overweight than people in LA. Afterall I am looking to Italy as a model. But the food is rich, and it would be easy to overdo it.


Can you eat classic Bolognese food regularly and not gain weight? I would argue "yes." Don't know if it is the 88 steps that lead to our apartment, the smaller portion sizes of many of the rich foods, the overall lack of processed foods as compared to the US, or the abundance of excellent fruits and vegetables in the markets, but both Paul and I are holding our own and even losing a little weight. Bologna has turned out to be the ideal place for us to live -- it is an epicenter of all things culinary and also an epicenter of the motorcycle industry.


Although I travel Verona to do research, there are many things to get involved with here in Bologna that relate to my project. The Slow Food Bologna group is very active and has been extremely welcoming. This is important to me because I have been volunteering with Slow Food LA as the Social Action Committee Chair, and I think that getting involved here in Bologna will help me learn more about the organization and give me more ideas for projects in the States. Here are a few photos of what I have been doing with Slow Food Bologna so far.


Each Saturday, Slow Food Bologna holds a farmer's market, called Mercato della Terra. I like shopping there because it has a very friendly feel to it. Here's Paul at the entrance.


One of the farmers who sells eggs likes to bring a few chickens to the market for everyone to meet. He is very friendly and was quick to invite us to visit him at his farm.


The chapter also holds regular events in connection with the market. Over the last few weeks I attended two cooking classes in the kitchen of a community center adjacent to the market. The classes started in the late morning and began with a little shopping at the market to pick up the ingredients, followed by a couple hours of cooking, then a group lunch complete with wine made by market vendors. The first class was on biodynamic cooking and the second was on cooking with cherries, which are now in season and are incredible. Unfortunately I didn't have my camera for the cherry class, but here are a few photos from the biodynamic lesson. We made couscous with seasonal vegetables, seitan with fresh herbs, and a clafoutis with strawberries.


Through participating in the classes, I was able to get to know some of the members and the leader Laura, which has helped me to learn about what is going on in the area. One of the members, Lella, who is involved in setting-up community garden projects, offered to take me to a local elementary school where a teacher established a school garden. The kids were already out of session, but it was still fun to visit.


As one of their projects, the kids made a lettuce and herb garden using recycled water bottles. They were also growing hazelnuts--I had never seen a hazelnut tree before.


Sunday, June 20, 2010

Silverstone MotoGP

Two words for all the MotoGP fans....GO TEXAS!!!  Great race today.