
Not just ANY recipe, though - for me this one is the big daddy, the #1, the ne plus ultra. It's pesto Genovese, and it's my go-to dish whenever I'm expected to make food for a dinner party, a potluck, a tasty meal at home, whatever. Easy to make, doesn't use too many dishes, flexible in its proportions, and consistently, reliably, GOOD.
What's more, it's a world apart from any pesto you will ever buy in a jar or find at a restaurant. Which means it's much, much better than the pesto that anyone you'll be serving it to has had, unless they've made their own or eaten someone else's homemade.
Just think: You'll have the nice couple you invited over for dinner tonight fighting over the last bits in the serving bowl, and greedily licking the serving spoon like crazed animals. The ladies at the church group picnic will be rolling their eyes heavenward and near-blaspheming with every bite. You'll dazzle your spouse, taking them back to the magical time when you first met and didn't yet know what each others' used Q-tips looked like. You'll earn enough "points" to preemptively offset years and years of poor behavior on your part.
Am I full of hyperbole and empty promises? Try it and see.
Makes about 6 servings, and takes from 20-40 minutes depending on your chopping and grating skills...
Here's what you'll need:

1. 3/4 cup extra-virgin olive oil
2. Fresh ground pepper
3. Salt (preferably Kosher)
4. 1/3 cup raw pine nuts
5. 3 cloves garlic
6. Pasta - a small-to-medium shape with ribs to hold the sauce is best. Penne or pipe rigate are good choices and easy to find.
7. Parmigiano-reggiano and pecorino romano cheeses - you'll need 1/2 cup grated of each. It's very important to use freshly bought cheese in this recipe. I've tried making it with cheese that's been in the fridge for a while and has gotten a little dry, and it makes the difference between "meh" and "WOW."
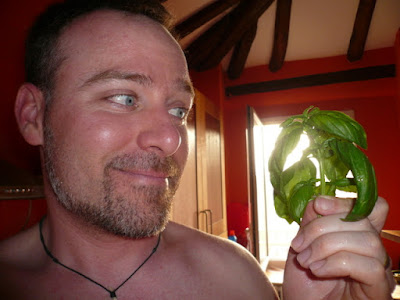
8. 2 packed cups basil leaves - like the cheese, the quality of the basil is very important here. Basil's highly perishable once it has been picked, and you need the leaves to be perfect. Pesto, you see, is a raw sauce, so you don't want to use any leaves that don't look good enough to just pop in your mouth.
We grow our own basil, and I'm a little in love with it because it's so good.


But, you can also find some good basil at your local farmer's market, or failing that at Trader Joe's or Whole Foods (be careful that the TJ's stuff isn't moldy though, give a close look inside that plastic box).
Oh yeah, I didn't take a picture of it but you'll need a little butter too.
Ready to go? Here's what you want to do:
Step 1: Fill a large pot with water for the pasta, put it on the stove on high heat, and add a good quantity of salt.

Step 2: Put your 3/4 cup olive oil into a mixing bowl or plastic storage container. You'll be mixing the sauce in here, so give yourself some room, and if you're planning on having leftover it's easy to just make it right in whatever you'll be storing it in.

Step 3: Pick, wash, and dry your basil. If you've bought it on the stalk (most likely), lovingly pick all the leaves from the stems, because you don't want any stems. Yes, it has to be done with love.
My favorite way to wash the basil is to fill our salad spinner bowl with plenty of cold water, put the basil in, and swish it around. All the sand will drop to the bottom. Then just use the salad spinner to dry.

Step 4: Chop dat basil. Hand chopping is what I recommend, but you have to be patient and consistent...if you're feeling lazy you can put it in a food processor and "pulse" chop it, but BE CAREFUL not to liquefy the basil. Little rustic-looking squares that measure about 1/16" are ideal.
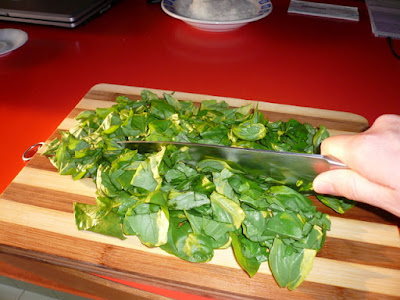

It will take a while, cause 2 packed cups of basil leaves is a lot. If you need some inspiration, here you go:
When you're done, immediately put the basil into the container with your olive oil and swish it around so it's covered. Keeps the basil from oxidizing and turning dark.

Step 5: Time to do the same thing to the garlic, except you actually want to mince it.


Be very careful not to leave any big pieces, because like I said this is a raw sauce and munching down on a big piece of raw garlic isn't the most fun. If you can't mince it by hand, a garlic press will do. Once it's done, put the garlic into your oil-basil mixture and again swirl it around to mix a bit.
Step 6: Now, get your pine nuts. I like to use a "healthy" 1/3 cup.

Put them in a heavy-bottomed pan, cast iron if possible, and set them over LOW heat. You need these suckers to toast only a little, and if the heat is too high they'll burn.

Step 7: Grate the cheese, 1/2 cup of parmigiano and 1/2 cup of romano, mixing the grated cheeses is fine. It's easiest to do it into a separate bowl or pan, and then scoop it with your measuring cup.
I use this little Italian hand grater, otherwise known as "Satan" due to the ridiculously aggressive teeth, painfully uncomfortable handle, and overall unstable/poor design that give it an uncanny propensity to nip fingers. If you have ANYTHING else, use it. Blood in your pesto is never a good thing.

When you're done grating the cheese, thoroughly mix it into the oil/basil/garlic. Voila, you should see a nice texture appear in your sauce. But you're not quite done yet.
Step 8: Check those pine nuts! Toss them around in the pan a bit to make sure they're getting evenly browned. When most have got a nice toasty brown, it's time to do some more chopping. Now, these, you NEED to hand-chop. It's one of the things that make this pesto better than the others. You want to get a nice variety of pine nut pieces....no whole nuts, but chop them roughly so that there are some biggish pieces, some tiny crumbs, and everything in between.
Seriously, all the old Ligurian Nonnas at the local PTA meeting are going to cry with jealousy.

When you've chopped the nuts to satisfaction, mix them on into your sauce. Add some healthy grinds of black pepper, and a small amount of salt, maybe 1/4 tsp.
Your pesto, friends, is done, and it's amazing, but don't jump the gun because there's a few more things to discuss.

The pesto can sit so go ahead and throw your pasta into the water, which should be good and boiling by now. When it's done, though, here's what you wanna do. It's one of the other things that is going to make this dish great.
You see, pesto looks really nice on pasta when it's all served in kind of a blob, and you let the guests mix it themselves. But drained pasta, sitting in a bowl with no sauce to coat it, will stick to itself very quickly. So here's what you want to do. When you put your drained, hot, ready-to-go pasta into the serving bowls, get that butter that I mentioned earlier, and put a nice pat on top of each bowlful. Now take some spoons or something and GENTLY (so you don't break the pasta) mix it around, melting the butter and coating the pasta with it.

Now, you can put your pesto on top and serve, and the pasta won't stick! A little sauce goes a long way, so don't overdo it.

One last tip. You'll likely have leftover pesto. Remember, this is a raw sauce and is best if it stays that way. So for the best flavor, store the sauce alone in the fridge, and make more pasta fresh when you want to eat it again. If you just make extra pasta the first time, put the extra sauce on it, and microwave the whole thing later (thereby heating/cooking the pesto), it won't be as good, I PROMISE.
Anyways, I hope you've enjoyed this. If everything goes according to plan, this will be your end result:

Oh, and as a final note - when it's been served, eaten, and you've won universal acclaim for your amazing pasta; when the Italian grandmothers fear and respect you, you've got Mario Batali leaving you incessant voicemails, and the paparazzi won't leave you alone because they just have to get a cover shot of THAT PERSON WITH THE AMAZING PESTO, just remember, don't pose for any pictures.
At least, not until you've checked a mirror.


Hahahaha. Wonderful post!! We will give it a try and let you know how it turns out.
ReplyDeleteOkay so we tried it and the dish is wonderful!!! Thank you for sharing. Here are some pics of the process and final project. :D
ReplyDeletehttp://alderetes.posterous.com/inspired-by-paul-and-emily
Tanya...I am SO glad you tried and enjoyed it! Your photos of the finished product are AWESOME!!!
ReplyDelete